|
|

how to
view and edit your event's registration page
Do you need to know your participants' shirt sizes, but you forgot to add a question when you created the event? Do you want to add detailed directions to the lake so your participants know where to go? No problem! Follow the steps below to learn how to add, edit or remove details from the Participant Registration page after it has already been published.
|
Step 1: loginLogin to your Club Dashboard using your Email or Club Membership ID and password
|
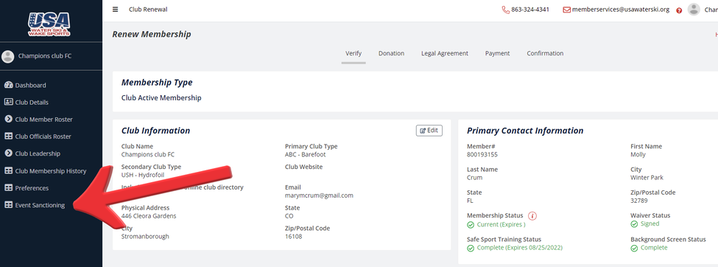
Step 2: access event sanctioningOnce you have successfully logged in to your Club Dashboard, click on the "Event Sanctioning" link on the left hand side of the screen to access the Event Management System
|
|
|
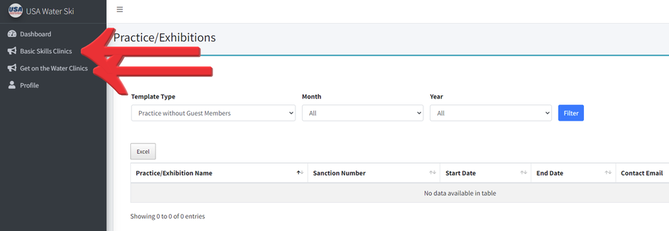
Step 3: select your event typeFrom the Event Management System home screen, pick the type of event to view your sanctioned events in that category.
|
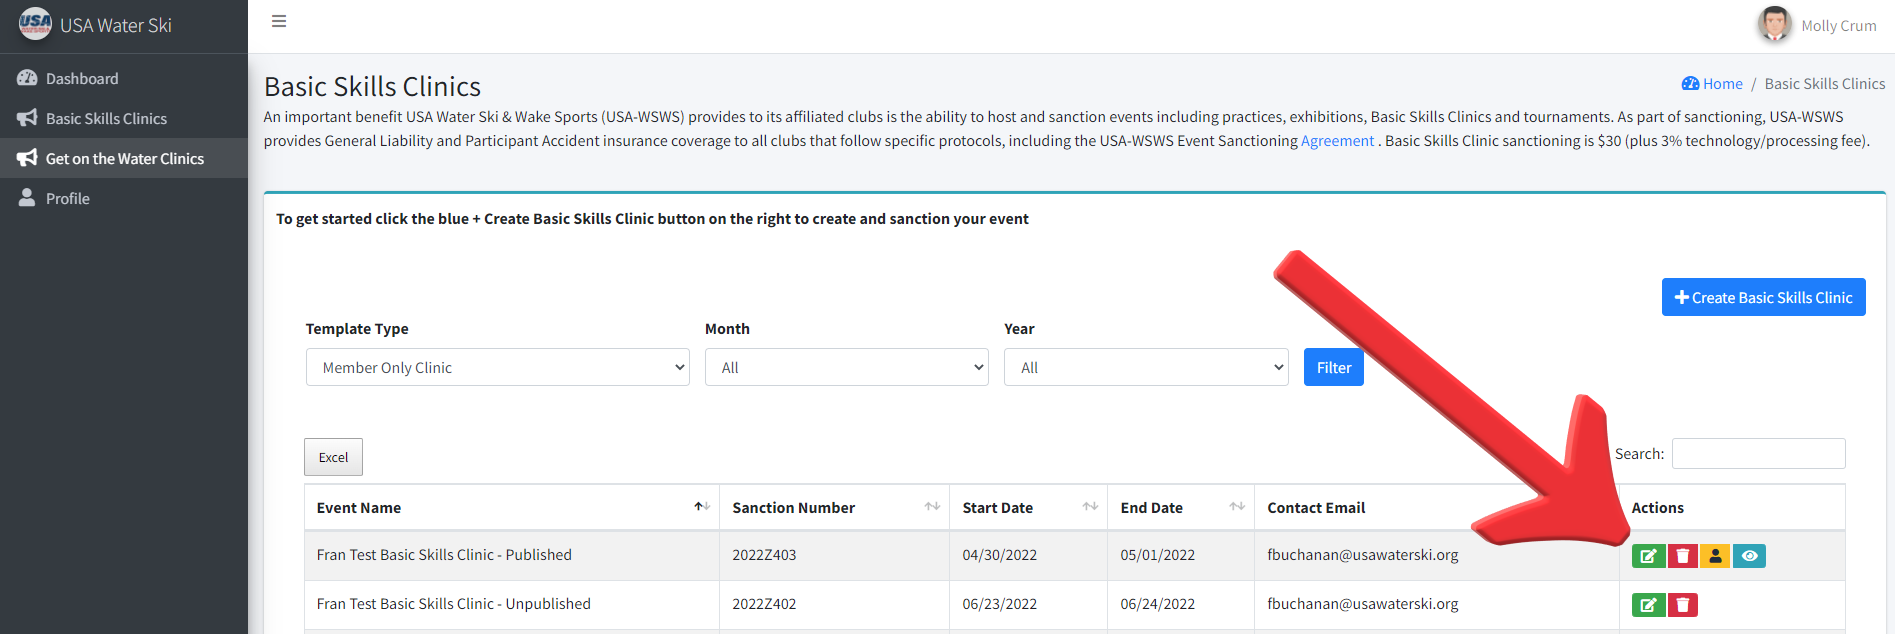
Step 4: open event editorOnce you are within your event category, click the green icon next to the event you would like to edit to open the event editing options.
|
|
|
add, edit or remove event details from your registration pageNOTE: Not all events have the option to add custom information at this point in time.
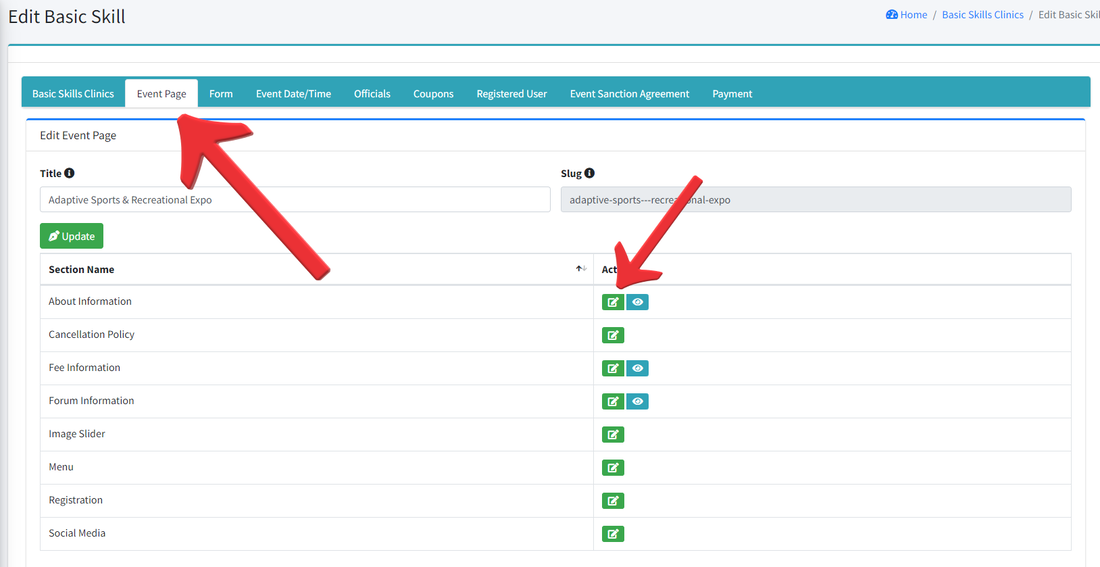
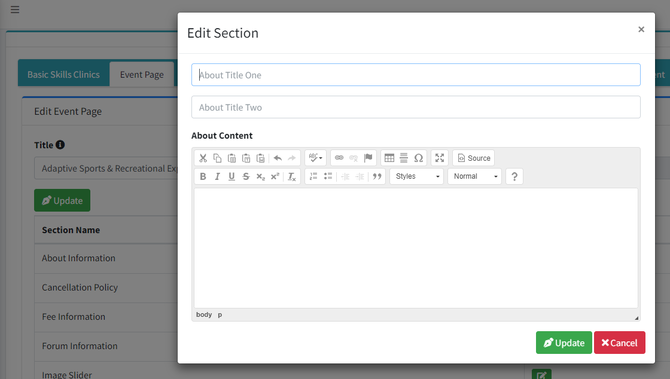
Click on the "Event Page" tab to access the editing tools for your event's registration page. To edit or add information to a section, click the green icon next to the section you would like to add or edit information for. Next, add or edit your information in the pop-up window. As an example, if you want to add specific directions to your lake, put "Directions" in the "About Title One Field" and add the directions in the paragraph field. Information added here will display for participants on your event's registration page. Make sure to click the green Update button once you have made your edits |
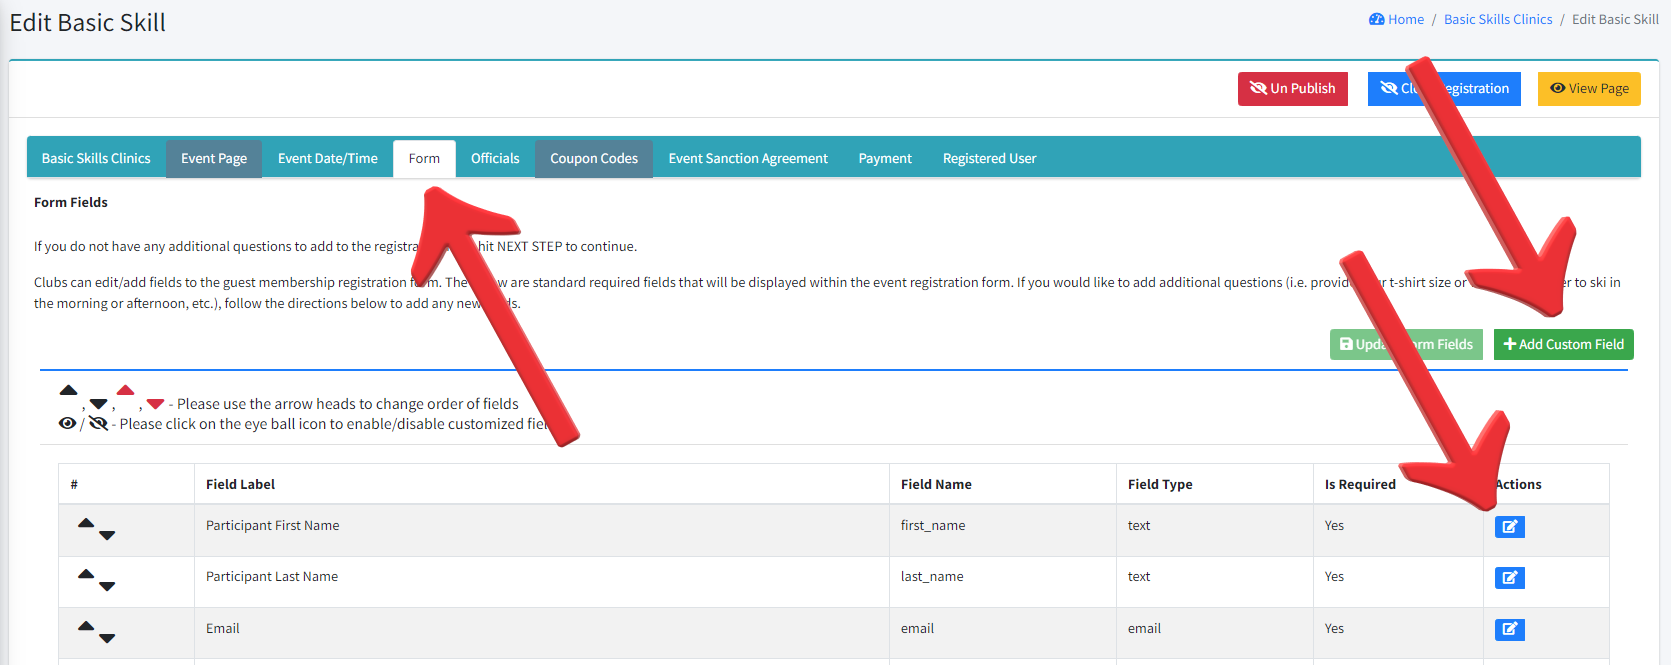
ADD or edit custom questions on YOUR REGISTRATION PAGEClick on the "Form" tab to access the editing tools for your event's custom registration fields and questions. These are the fields that a participant will fill out when they register for your event.
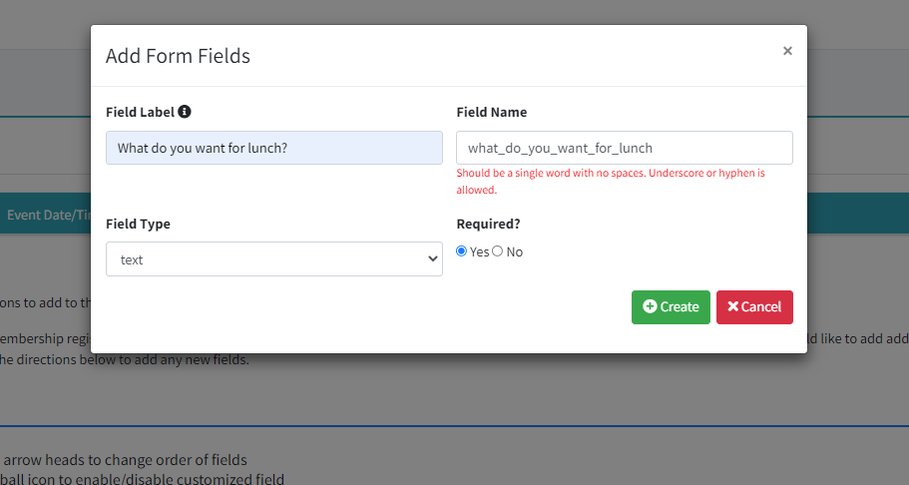
To edit an existing field, click the blue icon next to the field you would like to edit and make your edits in the pop-up window. To add a new question or field, click the green + Add Custom Field button on the right-hand side of the page and add your information in the pop-up window. As an example, if you want to collect shirt sizes, put "Shirt Size" in the "Field Label" field and choose the type of question from the "Field Type" drop down. If you would like to give the participant options to choose from (example: "Small", "Medium", etc.), choose the "Select" Field Type option from the drop down and add your options in the space provided. Click the green create button to save your changes. |
|
|
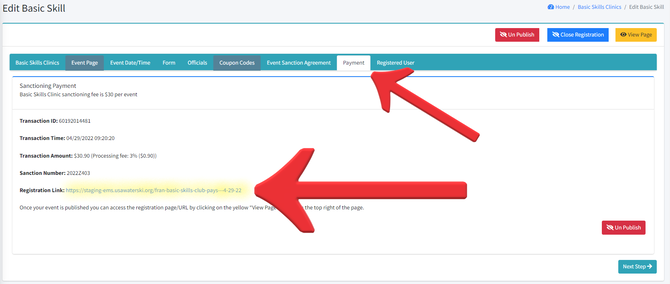
share your participant registration linkFrom the "Payment" tab, you can find your event's "Registration Link". This is the link/URL you can share with participants to register for your event once it is published
|
|
|
resources |
|

Progress Card
|

Insurance Fact Summary
|

Environmental Brochure
|

Tournament Kit/Necessary Documents
|
|
Call us at 1-800-533-2972 or e-mail us at [email protected]. Our headquarters office is located in Polk City, Fla., and includes a staff of seven. We can help you find whatever you need.
|